Whether listeners recognize it consciously or not, audio can make or break a project. Poorly balanced sound strips a dialogue scene of its weight, forcing audiences to focus on deciphering voices from background noise. Poor podcast audio becomes distracting, action scenes lose their impact, and songs become a mess of competing tracks and vocals. Regardless of the quality of the rest of the project, audio editing and clarity have a huge impact on how the we receive content. In fact, a recent study of online videos found that there was an 89 percent correlation between highly-rated videos and good audio quality.
The window to connect with an audience or listenership is shorter than you may think. Your project may have as little time as 7 seconds to convince people to continue paying attention. Especially if someone has no prior knowledge or connection to your work or brand, chances are slim that they would push through bad sound and focus on your content. Well edited and produced audio acts as an invitation to pay attention, since it is clear that there was intention and skill in creating the project. Good sound is a major step for setting yourself up for success.
Production with Intention
However, balanced, clear, compelling audio doesn’t just happen on its own. First, planning is important to bring together the right tools and technology to record. Then, a strategic voiceover lays the groundwork for a high-quality production. Once recording is complete, a final, important stage comes into play: post-production. In this blog post, we explore what post-production is, how it applies to voiceovers, and post-production techniques to make your audio a resounding success… pun intended.
What Is Post-Production?
In its simplest terms, post-production includes everything necessary after the voiceover has been recorded (or rendered, as with text-to-speech technology). This stage can vary depending on your project. Videos often need careful editing and timing to match visuals and sound. Conversely, a podcast or audiobook focuses on immersive flow and pacing.
Audio should only stand out when the creator is trying to draw the viewer or listener’s attention. A well-timed, noticeable sound effect or transition can help the storytelling of a movie or hook viewer attention in an advertisement. But you never want your audience pulled out of your work by a jarring editing mistake or unexpected sound. Good sound design should be as invisible as possible, with your audience only noticing intentional choices and effects.
Since an unedited recording will inevitably include mistakes, retakes, and unwanted background noise, the post-production process is vital for making a seamless audio track or voiceover.
General Stages Of Voiceover Post-Production
However, audio post-production is not just about removing audio mistakes or adding sound effects. Rather, it can involve several different steps, based on the project’s requirements. Below is a breakdown of the most common stages in most post-production.
Sound Design
Sound design is where we plan and calibrate the audio track, including sound effects, whether for film, television, music, or voiceover.
Editing
Editing involves the selection and assembly of recordings and takes, bringing together the necessary effects, dialogue, and music (depending on the specific project). With voiceovers from text-to-speech scripts, editing can also involve strategically adding in pauses (i.e. via commas) or emphasis (i.e. via capitalizations) to instantly influence how the voiceovers sound.
Foley
Foley refers to when sound designers and engineers recreate and edit everyday sounds for an audio track. For many movie or video projects, sounds from the set (like footsteps) cannot be adequately recorded while the scene is filmed. Foley artists aim to make these replicated sounds as realistic as possible, making the project feel immersive and real. The recordings are then carefully edited together and timed for the final project. This work is also important for any podcasts or audiobooks, when we add sound effects after a voiceover.
Automated Dialogue Recording (ADR)
Automated Dialogue Recording (ADR) allows artists to redub lines of dialogue after filming, since poor audio or scripting changes can sometimes make the original lines unusable. The timing and editing of these lines have to be perfect, as with actors lip-syncing. Otherwise, the post-production ADR will be obvious to the viewer.
Mixing
Mixing refers to sound engineers bringing together all the different recorded elements, controlling and fine-tuning how they interact and work together to create the overall balance and flow of the final product. It is all about balance, making sure nothing is too overpowering or lost in the shuffle.
Mastering
Mastering is the final stage when the edited, mixed audio is prepared and transferred into its final form. Since mastering is the last step, any issues with the sound need to be ironed out by then. After the video, soundtrack, or audiobook is mastered, it should be ready for release.
Those larger steps in post-production can shift based on the specific needs of your project. Some projects will require massive amounts of foley recordings, while some will need none at all. Each medium has its own methodology, positives, and potential pitfalls.
Post-Production for Voiceovers
One of the more common types of audio post-production is voiceover recordings.
Voiceovers refer to off-camera or off-stage voice recordings. These voiceovers can overlay eLearning training modules, narrate online videos, or serve as the voice of advertisements. For example, instructional content and guides often use voiceovers to narrate learning and development content, while audiobooks rely on just the spoken voice of the narrator.
RELATED: What You Need to Know for Voiceover Script Success
In addition to audiobooks, podcasts, and online classes, advertisers are increasingly using voiceovers in their commercials or relying on audio-only ads. In 2020 alone, companies spent more than 3 billion dollars on digital audio advertising.
And this isn’t just referring to traditional ads, which might be spliced into a television show or radio program. Rather, many advertisers are turning to audio-only advertisements for podcasts or music-streaming sites like Spotify and Pandora. With proper editing, these audio ads can reinforce a brand’s message, connecting with audiences and building a lasting impression. These ads can, however, feel jarring and unwelcome if spliced in with inadequate post-production considerations and techniques.
Voiceover Post-Production Considerations
At first glance (or listen), an audio file may seem simpler for post-production than a movie, which could require effects, foley work, and musical score. But post-production is especially critical in non-visual mediums, where the focus is solely on the quality of the sound. If you compare unedited readings of books to properly mastered audiobooks, the difference in listening experience is clear. Pauses, mistakes, mispronunciations, noticeable breaths, and other distractions pull the listener out of the story or intended message.
Post-production is also an important step in other mediums where voiceover is one component of a larger project. For example, with educational content, including video tutorials or online classes, narration is the main method for communication. Not only does the spoken audio need to be crisp and clear, but the track should be free of distractions and out-of-place background noises. The timing between the voiceover and visual examples or explanations need intentional editing, keeping a united focus between the video and voiceover. Otherwise, the educational message becomes unfocused and confusing.
Narration
Adding narration to a video is not as simple as it may seem. Just as with a movie or music video, audio tracks for commercials need to balance sound effects, dialogue, music, and more to create a smooth and memorable experience. Since most online videos or advertisements have a shorter runtime than a movie, this makes the impact of the voiceover and sound even more vital. A poorly balanced audiotrack can confuse or frustrate the viewer, damaging the brand’s image in a viewer’s eyes. This is where the post-production process comes in.
Voiceover post-production can vary from project to project, but some particular steps are needed for most endeavors. Below are some of the important voiceover post-production considerations.
Tone
When editing and mixing spoken audio, there are specific ways to improve the recording and make the narration as clear as possible for the listener.
A certain tone or intonation may be required, so an editor will need to parse many different takes, searching for the perfect version. With modern post-production technology, it is even possible for a single word to be split from two different takes by the voice actor. Since a single voiceover audio track is needed for further post-production, this stage is important and should not be rushed. Swapping outtakes or recordings later on in the process can create much more work and leave behind audio artifacts that can be difficult to remove.
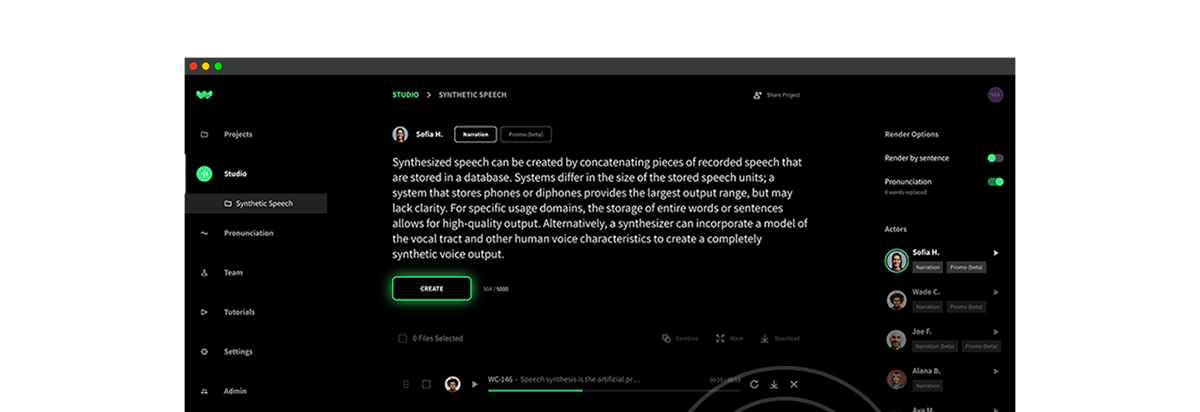
Many companies are turning to text-to-speech technology to select one or a few Voice Avatars unique to their tone, context, and branding needs so they have less editing to do on the backend, and know the tone is right from the start.
Pace
Another important consideration is pace. With educational content, you may want a slower pace so that learners have time to digest complex concepts. With hard-sell advertisements, you may want a faster pace that encourages immediate action.
When editing a voiceover, make sure to communicate clearly with the brand or project manager about the intended pace. Since an editor should remove pauses, mistakes, and extraneous words, the post-production can easily speed up or affect the pace of the final product. Having a clear goal during this initial edit will greatly speed up the process down the line.
Distractions
As well as aiming for a particular tone, an editor should also make the recording clean and free from distracting sounds. Voice actors obviously need to breathe, and these intakes of air and exhalations can stand out—especially in an audio-only medium. Removing these breaths should be done carefully, with the genre of the voiceover in mind.
Text-to-speech technology can alleviate some of these distractions by creating human-like voiceovers, but without the awkward sounds that sometimes arise like swallows or voice cracks.
Listeners know what a discussion between people sounds like, so an editor should aim for a realistic and conversational sound with only the distracting breaths and mouth-sounds removed. Voiceovers are not one-size-fits-all. A good post-production editor should remember this and tailor the voiceover to fit the end-goal.
Music and Sound Effects
Whether you are working on an advertisement or an online video, pairing a voiceover with music and sound effects can be a balancing act. There are often moments where one aspect of the sound needs to take a backseat and let the other tracks shine. When the musical score swells, the narration needs to be balanced so it is not competing for attention. Sometimes a specific sound effect should pop through the music and narration, hitting hard at the exact moment an editor intended. This balance is important for dialogue and sound effects in movies. It is also key to the impact of a short commercial or video, since the chances to connect effectively with the audience are briefer.
In an atmospheric audiobook or podcast, the interplay between voiceover, sound effects, and music should be a major part of post-production. Background noise and effects can easily feel overdone or gimmicky if they are too dominant in the mix. The focus should be on the voiceover. The effects and music serve to elevate the narration and make it feel more immersive.
Audiences could feel lost if the final audio does not have a clear aim at all times. Good editors need to seamlessly ‘steer’ the focus between different aspects of the audio. Being clear about the goals of the project at the outset helps avoid headaches later on.
Voiceover Post-Production Techniques
Now that we have covered the stages of audio post-production let’s review some different post-production techniques. These go from simple tricks to expert strategies for the best possible final product. Each step in post-production also comes with potential pitfalls and mistakes you want to avoid. Let’s review each in detail below.
Compression
By adding a gentle compression effect to the voiceover track, the peaks and valleys of the recording can be smoother. The simplest type of compression is downward compression. This can immediately make a recording sound better, since jarring spikes in the volume are toned down. The valleys in the audio recording can also be lifted, making sure every word is intelligible. This process can be done manually, but even automated compression can quickly elevate your narration. Based on the different timelines for post-production, it’s good to use different techniques to hit the deadline or budget.
For more advanced sound engineers, controlling the peaks and valleys in an audio track manually adds a higher level of control. Using sound normalization, an editor can manually set the higher and lower levels, optimizing the recording for each project. Some projects have different decibel (dB) level requirements.
Volume Automation
An alternative to compression is volume automation, where software focuses on certain sounds that tend to “feel” louder (even if they are not actually too loud). Volume automation can help sounds like “s-” or “p-” feel more balanced since they tend to pop in a voiceover. This is the case even if they do not technically hit the levels of the compression software. Understanding your options when it comes to compressions and volume automation puts you in the power position to shape an audio project in specific, strategic, smooth-sounding ways.
Noise Gates
By adding a noise gate, an audio file instantly cleaned up and sharper. Noise gates use software to cut out sounds below a certain threshold. This effect elevates the voiceover, removing unwanted room tone or background sounds. This step can also speed up post-production and pay dividends as your editing skills increase.
However, it’s also important to understand the limitations of noise gates. If the recording location has background noise, such as a ceiling fan, the software my misidentify certain sounds. A softer-spoken recording (particularly sounds like “f-” or “s-”) could disappear as well. A sound engineer should check the recording. He or she is making sure the noise gate had its desired effect without negatively affecting the narration itself. Software can definitely help but could remove parts of certain words if an editor is not careful.
Pauses
As you are editing a voiceover, it might seem appealing to remove every single breath or pause completely. However, this does not always lead to the best final product. Narrations will sound unnatural and inhuman without any pauses for breaths. In fact, breaths and pauses are what make sophisticated text-to-speech technology sound more natural than earlier robotic iterations. Those tended to pause at unnatural times or never stopped to take a breath or swallow.
If you’re looking to remove excess breaths, there are different software plugins. Functioning in a similar way to noise gates, they can remove breathing sounds. This saves you manually removing every single inhalation or pause, which can help during crunch time.
Breaths
However, it is important to not simply trust the software here. We want to reduce breaths, not remove them. Also, some voices might cause the software to remove the wrong part of the audio. This occurs especially when pronouncing a “breathier” syllable. Just as with compression and noise gates, software helps speed up the process. However, we can achieve an even higher-quality voiceover when an experienced sound engineer fine-tunes the effects. This way, the engineer fixes issues that automated plugins miss.
During necessary pauses, complete silence will also stand out to the listener. You can pull “room tone” audio from other parts of the recording, masking the break in narration. If this is not taken into account, the end product has an unpleasant “start-and-stop” effect. This occurs as the background room tone cuts in and out constantly. Even expensive recording booths still have their own room tone. It will make a voiceover feel like one perfect take if you use it consistently. This adds significantly to the professional style of your narration.
Splicing and Fine-Tuning
As you are bringing your fragmented recording(s) together, make sure to cut the voiceover at the best points. This occurs after adjusting breaths, fine-tuning emphases, and piecing together the whole production. If you need to split up a phrase, or meld two sentences together, aim for the harder consonants. Trying to join two different takes during a sibilant sound, like “s-” or “th-”, can make the cut obvious. Being strategic here can hide your role in the smooth recording.
Also, fades are one of the best tools when it comes to audio post-productions. There should never be a clean cut in the sound, since this sounds obvious and jarring to the listener. Fades can help during the final mixing process, hiding the editing seams throughout the recording.
Lastly, it’s always a good idea to check the entire project one final time. Audio artifacts can exist when we remove or shift a section, having effects on the recording in either direction.
Creating a High-Quality Voiceover Post-Production
The needs and structure of voiceover post-production will vary depending on the purpose, timeline, and audience of your project. Thankfully, there are many different levels of editing and mixing available, ranging from basic to expert. Regardless of your type of project, your voiceovers can improve by incorporating even just a few of these tips. Better yet, use a text-to-speech technology like WellSaid Labs that alleviates a lot of the heavy lifting.
This is a field with room to expand, led by advancing software and passionate sound engineers. By focusing on clean cuts, smooth transitions, well-placed sound effects, and a consistent, natural-sounding tone, your project can reach a new level of professionalism and quality.